Door lock cylinder replacement. If you’ve ever experienced a jammed or broken door lock, you know how frustrating it can be. The good news is that door lock cylinder replacement is a relatively easy DIY project that can save you time and money.
In this article, we’ll cover everything you need to know about door lock cylinder replacement, including what it is, why you might need to do it, and how to replace a door lock cylinder yourself.
What is a Door Lock Cylinder?
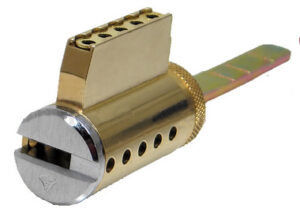
The door lock cylinder is the part of the lock mechanism that you insert your key into to unlock and lock your door. It’s a small metal tube that contains the lock mechanism and connects to the lock body on the outside of the door.
Door lock cylinders are available in a variety of shapes and sizes, depending on the type of lock and the brand. They’re usually made of brass or steel and can be replaced relatively easily.
Why Replace a Door Lock Cylinder?
There are several reasons why you might need to replace a door lock cylinder. The most common reason is that the cylinder has become jammed or broken, which makes it difficult or impossible to open the door. This can be caused by a variety of factors, including wear and tear, corrosion, or damage from attempted break-ins.
Another reason you might need to replace a door lock cylinder is if you’ve lost your key and need to change the lock. In this case, replacing the cylinder is a more cost-effective option than replacing the entire lock mechanism.
Replacing a Door Lock Cylinder: Step-by-Step Guide
Before you start replacing your door lock cylinder, it’s important to make sure you have the right tools and equipment. Here’s a list of what you’ll need:
- Screwdriver
- Pliers
- Replacement door lock cylinder
- Lubricant (such as WD-40)
Once you have everything you need, follow these steps:
Step 1: Remove the old door lock cylinder
To remove the old door lock cylinder, start by removing the screws that hold the lock body in place on the outside of the door. You may need to use pliers to pull the lock body away from the door slightly to access the screws.
Once you’ve removed the screws, gently pull the lock body away from the door. You should be able to see the door lock cylinder inside the lock body.
To remove the cylinder, use a screwdriver to turn the small screw on the back of the cylinder. This will release the cylinder from the lock body.
Step 2: Install the new door lock cylinder
To install the new door lock cylinder, start by lubricating the new cylinder with a small amount of lubricant. This will help it slide into place more easily.
Next, insert the new cylinder into the lock body from the outside of the door. Make sure it’s positioned correctly and then use the screwdriver to tighten the small screw on the back of the cylinder.
Step 3: Test the new door lock cylinder
Once you’ve installed the new door lock cylinder, it’s important to test it to make sure it’s working properly. Insert your key into the cylinder and turn it to make sure the door locks and unlocks smoothly.
If you encounter any issues, such as the cylinder being difficult to turn or the door not locking properly, you may need to adjust the cylinder or seek professional assistance.
Benefits of DIY Door Lock Cylinder Replacement
Replacing your door lock cylinder yourself can save you time and money compared to hiring a professional locksmith. It’s a relatively simple DIY project that can be completed in just a few steps.
Additionally, replacing your own door lock cylinder can give you peace of mind, as you’ll know that you’re the only one with access to your home. It’s a great way to upgrade your home security and prevent