Ever wondered how you could create a key mold from a lock? Well! We’re talking about a simple and exciting journey of making a key mold. Imagine the fun of playing detective with your locks and keys. You’ll learn to pick the right materials, get the feel of the clay, and capture the unique pattern of your lock. So, roll up your sleeves, and let’s get crafty together! With patience and a bit of flair, you’ll master this cool trick in no time. Ready? Let’s make some molds!
Can you mold a key from a lock?
Yes! You can make a key from a lock by using “impressioning.” First, you insert a blank key into the lock and turn it gently. The pins in the lock will press against the blank, leaving tiny marks. You then file down the blank where the marks appear. Repeat this process several times, and the blank key will eventually match the lock’s unique pattern. It’s like making a puzzle piece fit just right! This method requires patience and practice, but it’s pretty neat to craft a key this way.
How to make a key mold from a lock?
Making a key mold from a lock is like solving a little mystery with your hands and wits. Here’s a step-by-step process to help you.
Step 1: Gather Your Materials
First things first, collect everything you’ll need. This includes some clay or a two-part molding compound, which you can get from a craft store. Also, get a thin blade, like a butter knife, and something to keep the lock steady, like a vise. And don’t forget those safety goggles to protect your eyes.
Step 2: Secure the Lock
Fix the lock firmly in place using the vise. If you don’t have one, hold it as steady as you can in your hand or ask someone to help. The lock mustn’t move while you’re working.
Step 3: Choose the Right Clay
Soft clay or a specific key impressioning compound is what you’re after. It should be malleable, a bit like the texture of cookie dough that’s ready to bake.
Step 4: Soften the Clay
Work the clay with your fingers. If it’s too firm, rolling it and squishing it will make it softer and ready to pick up all the details inside the lock.
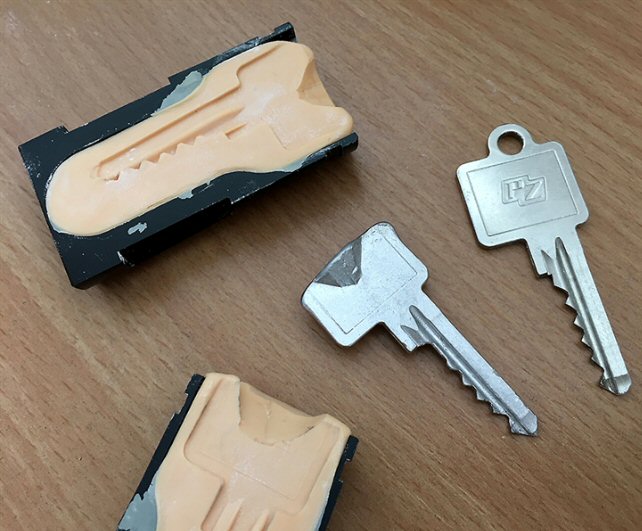
Step 5: Press the Clay into the Lock
Shape the clay into a small ball, just big enough to cover the keyhole. Press it into the lock, filling up the space. Aim to make the surface of the clay flush with the lock.
Step 6: Create the Mold Impression
Now, press the blade’s flat side into the clay-filled keyhole. Twist it gently like you would with a key. This step is critical because it helps to capture the shape of the keyhole accurately.
Step 7: Let the Clay Set
Leave the clay alone to set. This could take anywhere from a few minutes to overnight, depending on the material you’re using. Follow the instructions closely.
Step 8: Remove the Clay Carefully
Gently coax the clay out of the lock. This part requires a light touch. You want to keep all those impressions intact.
Step 9: Check the Mold
Examine the clay for the distinct pattern of the lock’s inner mechanism. If it worked, you’ll see the pins’ impressions marked.
Step 10: Fix Any Mistakes
If the mold isn’t quite right, that’s okay. Just knead it back into a ball and repeat the process. Sometimes it takes a few tries to get a perfect impression.
Step 11: Harden the Mold
Once you’re happy with the impression, set the clay aside to harden completely. This could take some time, so be patient.
Step 12: Use the Mold to Make the Key
With your hardened mold, you can now create a key. Take it to a professional locksmith or use it with a DIY key-making kit, following the provided instructions.
Step 13: Test the New Key
Once your key is made, give it a whirl in the lock. It should fit smoothly. If not, the locksmith may need to make minor adjustments.
Step 14: Smooth Out the Edges
New keys sometimes have small burrs or rough spots. File these down gently to avoid damaging the key’s profile.
Step 15: Celebrate Your Success
You’ve achieved something pretty neat. Enjoy the satisfaction of your craftsmanship, and know that with this skill, you’ve got a handy trick up your sleeve.
With attention to detail and a bit of practice, making a key mold from a lock can be a rewarding DIY project. Keep these steps in mind, and you’ll refine the process with each try.
Tips on How to Make a Key Mold
Ready to make a key mold? Here are some friendly tips to guide you through the process. Making a key mold isn’t just practical; it’s also a crafty adventure. Let’s get started!
Tip 1: Choose the Right Material
Pick a molding material that’s easy to work with. Soft clay or a two-part molding compound works great. They should feel pliable, like well-kneaded dough.
Tip 2: Keep Your Workspace Clean
A tidy space makes everything easier. Clear your table of clutter. Lay out your materials so you know where everything is.
Tip 3: Secure Your Lock
Stability is key. If you’re using a vise, make sure it grips the lock firmly but not too tight. You don’t want to damage it.
Tip 4: Warm Up the Clay
If the clay is stiff, warm it in your hands. Roll it, squish it – get it ready to take on the shape of the lock.
Tip 5: Be Generous with the Clay
Use enough clay to fill the keyhole and then some. It’s better to have a bit more clay than not enough.
Tip 6: Gentle Pressure
When pressing the clay into the keyhole, be gentle. Imagine you’re pressing a delicate sticker onto a piece of paper.
Tip 7: Make a Clean Impression
Use a flat, thin tool to turn the clay in the lock. This helps get a clean impression of the keyhole’s inside pattern.
Tip 8: Patience Is a Virtue
Give the mold time to set properly. Rushing might mean starting over, so let the clay take its time to harden.
Tip 9: Easy Does It
When removing the clay, ease it out slowly. A gentle twist can help release the mold without distorting the impression.
Tip 10: Examine Carefully
Check your mold for clear pin impressions. These tiny marks are the blueprint for your key, so they need to be sharp.
Tip 11: Practice Makes Perfect
Don’t get discouraged if it doesn’t work the first time. Try again! Each attempt brings you closer to the perfect mold.
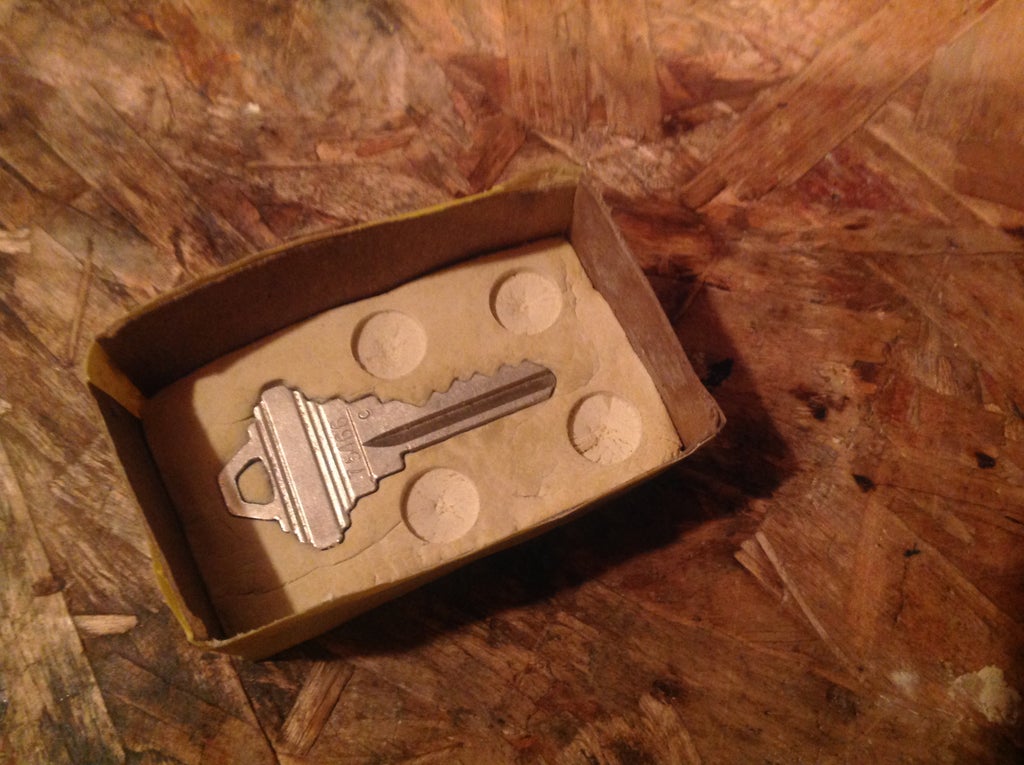
Tip 12: Store It Right
Once you have your mold, keep it safe. A little box or a padded envelope can protect it until you’re ready to use it.
Tip 13: Ask for Help if Needed
If you’re stuck, don’t hesitate to ask for advice. A locksmith can offer helpful tips and tricks.
Remember, making a key mold is a part art, part science, and a whole lot of fun. With these tips, you’re well on your way to creating something both useful and impressive. Keep your spirits high, and enjoy the process of learning something new!