Larson storm door lock cylinder replacement. If you’re experiencing issues with your Larson storm door lock cylinder, it may be time to replace it. A faulty lock cylinder can cause a lot of frustration and inconvenience, but luckily it’s a relatively easy fix. In this article, we’ll guide you through the process of replacing your Larson storm door lock cylinder, step-by-step.
One of the most important things to keep in mind when replacing your Larson storm door lock cylinder is to test it thoroughly after installation. Testing your new lock cylinder will give you peace of mind knowing that your door is secure and functioning properly.
To test your new lock cylinder, start by inserting your key into the lock and turning it to ensure the lock mechanism moves smoothly. Test the lock a few times to make sure there are no issues with the alignment or screws.
Larson storm door lock cylinder replacement
Step 1: Gather Your Tools and Materials
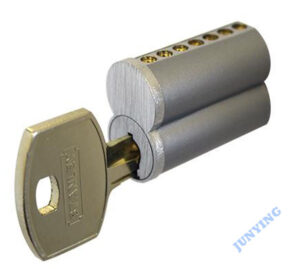
Before you begin, make sure you have all the necessary tools and materials. You’ll need a screwdriver, pliers, a new lock cylinder, and possibly a drill if the screws are stripped. You can purchase a replacement lock cylinder at your local hardware store or online.
Step 2: Remove the Old Lock Cylinder
Start by removing the screws on the inside of the door that hold the lock cylinder in place. If the screws are stripped, use a drill to carefully remove them. Once the screws are removed, gently pull the lock cylinder out of the door.
Step 3: Install the New Lock Cylinder
Insert the new lock cylinder into the hole in the door where the old one was. Make sure it’s aligned properly and insert the screws into the holes. Use a screwdriver to tighten the screws until the lock cylinder is securely in place.
Step 4: Test the New Lock Cylinder
Test the new lock cylinder to make sure it’s working properly. Turn the key and make sure the lock mechanism moves smoothly. If there are any issues, adjust the alignment or tighten the screws as needed.
Step 5: Reattach the Door Handle
If you had to remove the door handle to access the lock cylinder, now is the time to reattach it. Line up the holes in the handle with the holes in the door and insert the screws. Tighten the screws until the handle is securely in place.
Congratulations, you’ve successfully replaced your Larson storm door lock cylinder! With just a few simple steps, you’ve eliminated the frustration and inconvenience of a faulty lock. Make sure to keep your new lock cylinder well-maintained to ensure it lasts as long as possible.
In conclusion, replacing a Larson storm door lock cylinder may seem like a daunting task, but it’s actually quite simple with the right tools and a little bit of patience. By following the steps outlined above, you can quickly and easily replace your lock cylinder and restore your door’s security.